Saturday 16 May 2015

My fairy...my mum!

I love my mum! I really do! The older I get, the more I love her...
Maybe because I am now a mum myself and I realized what she went through raising me, I understand that she loves me infinitively, maybe because I already lost my dad, I miss him every day.....and I now know that one day I will lose her too. I hope this day won't come for many-many years, and before that day comes I am not going to miss any opportunity to let her know how much I love her, what an amazing person I think she is, and how thankful I am. If my dad was still here, I would do the same for him also.  
 
This year, for "mothers' day" I decided to make a card for her, with her as a fairy, through my eyes. The fairy she is to me. To show her what I see.
For the first time I had a quite clear idea of what I was making before I even started, so for the first time I have step-by-step footage. It's like my first official tutorial!!
 
I started with a piece of white cardstock 9''x9'', to fold it to a long rectangular card 4,5''x9''.
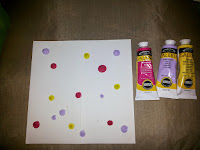
I chose the background colours and for the first time I applied this technique that I have seen numerous times : dots of acrylic on the surface


and then spread them vertically and horizontally using a plastic card.

Then I used a hearts stencil which I bough recently, and modeling paste with silver ink, and covered my background with silver hearts. My silver ink was far more vibrant and metallic than what I got after mixing it with the modeling paste. Therefore I decided to paint over some of the hearts with the silver ink for some interest.


 Then, I wanted to make it leafy and used a dylusions stencil for this and some acrylic paint applied using a sponge.
The result was very disappointing
 
 
So, I grabbed a baby-wipe to clean the green paint but because this smudged my background, I applied some gesso wash where I was planning to put all the leafs. I thought, maybe this wasn't too bad after all. Now my leaves will show better and since my fairy would go at the  


Then I used the leafy stencil again, but this time with my green markers, and after I traced each leaf, I painted over with green and metallic green paint.


To finish off the leafs, I used my pitt pen to make the details. 

Now, time to make my mum. I used the Suzi Blue technique (surprise surprise!) to sketch the face and the body on a smooth white paper. 

Then I cut the figure and spread a layer of mat medium all over it, to make it non-porous and use my pitt pens for the colouring, trying at the same time to create the shadows.


I gave her brown eyes and thick red lips, just like my mums' :-) 

To put the rouge on her chicks, I first put some ink on my finger and then rubbed it on her chicks.                     (I have destroyed numerous faces in the past when I apply pink first on the chicks and then rub it - wrong!). Also added thin black eyebrows. She is wearing a long green dress with long sleeves, the "Galadriel style", like a proper creature of the forest, and added some green cord around the neckline for interest and texture, gluing it with glossy accents. 

Then, I cut a heart and painted a metallic red. She will be holding this heart in her hands, to represent mothers' unconditional love.
My mother was born short-sighted and this was realized at the age of 4! For the first 4 years of her life she couldn't see like the rest of the people, and she still remembers the first time she put on glasses, to realize what the rest of people see. Her short sight is quite big (9 degrees) therefore she always wears glasses. So I had to give her glasses as well. That was a bit tricky, I used some metal string. It took some patience but I made it! I secured the glasses only at the back of the head, to keep the image clean and to let it have dimension.
Now, time for her wings. I drew 2 wings on a piece of white paper. Applied a layer of gesso and painted them gold. Also, I took a small piece of tulle and painted it purple with some distress paint, pulled it into small strings and glued them on the wings with mat medium.  

Then, I glued the wings at her back and glued the figure on the card, leaving the wings unglued, to let them curl and have dimension. Applied gesso to where her hair would be.


Another thing about my mum is that she has short, fluffy, black, afro-like hair.  So, I really wanted to give some dimention there, therefore I mixed some modeling paste with black metallic paint and applied it with a spatula, trying to create some picks and curves.
I had to hold myself from adding more sparkle!


I am very pleased with the result but I think I should have made it into a canvas.

Oh well, maybe next year!

I will participate with this over at the Getcreative Challenges blog. They have a special challenge with theme "For the Ladies or Mothers' Day", sponsored by OddBall Art (I can't even start talking about how much I love OddBall and the countless hours I have spent on their website just admiring their beautiful work... totally my cup of tea!).


Wednesday 13 May 2015

Dolls and girls and practice

I am still hooked up with drawing girls the Suzi Blu style.
As I said in my previous post, because I don't have the materials she is using I am trying to adjust the technique to what I have available.
First, I sketched and sketched and sketched. Non-stop, everywhere, as much as I could. On the bus, at the doctors' waiting room, waiting for my son during his swimming lessons, on the car while my man is driving us to places, on the bed, on the plane, at he playground, everywhere I'm telling you!
Then I coloured....
For some reason, I am not sure why, I enjoy a lot using colouring pencils! I feel like a kid every time I use them, maybe that's why. I have some Polychromos and Watercolour pencils. I   l o v e   my watercolour pencils, it's like magic, but I already used them to make a girl and this was not a success, (you might recall from my previous post). 
I enjoy colouring with my Polychromos as well, but I've never been pleased with the result and this time was no exception. I guess I have to learn on the techniques using colouring pencils, but this is another subject (I shouldn't forget this "note to shelf" though).
Here are some examples of the girls I created with Polychromos.
                                               

Then I decided I would like to try my India Ink PITT pens and my fingers. For this technique I need non-porous surface, therefore I applied mat medium over some of my sketches before I start colouring them. I was a little bit more pleased with this technique. I guess the coloured pencils require great skill which I don't have at all (cause I have seen some amazing art created with coloured pencils), on the other hand, colouring with the marker and then moving the ink around with the fingers to create shadows etc. I feel it's much more safer and appropriate for my level. Anyway, here's some of my girls coloured with my Pitt markers.
 
 
In her book, Suzi advices to practice a lot and only after practice you might end up sketching without measuring etc. She supports that anyone who wants to be an artist can be one, but practice is important. It makes sense. It's like everything else in life. Unless you are truly gifted with a talent, you need to practice to excel. Personally I love many things that require talent (drawing being one of them) but I don't have that much of it, so I figured, practicing a lot makes sense. I already see and feel the difference. My girls are much better now, I sketch them faster and I even personalize with things I am not that comfortable with, such as wearing hats, looking to other directions than straight ahead, holding things...
 
 
I am fairly pleased with the PITT technique but I think I will also give a go to use acrylics in the near future. If I do, I will update this post in time.
 
Stay tuned as my next post will be about making my mum into the fairy she is to me, as this years' mothers day gift.
 
Take Care!!!


Tuesday 14 April 2015

I am entitled to be me!

So, here I am, playing for the April Challenge at the Scraps N Pieces Challenge Blog.
The theme is "Be Me" and there is this lovely moodboard. Not only I really love the colors, but also the challenge instructed to use watercolors, mists...

 
What a great excuse for me to use my Faber Castel watercolor pencils. I just love it when I go over them with the brush and watch the transformation of the color coming to life!
A few days ago I finally got my hands on a book I wanted a long time ago, the Mixed Media Girls by the gifted and original (in my opinion) Suzi Blu. 


I practiced a little bit the technique she teaches through this book but I couldn't wait to actually make something with it.
The "Be Me" challenge with the inspiring moodboard and my most favorite colors in the palate (purple and teal), the opportunity to use my watercolor pencils and my mists, along with my impatience to make a whimsical girl resulted to this page.
So, I'll talk you through it:
1. Glued 2 pages together from each side and then applied a layer of Gesso
2. I used Dylusions Ink Sprays in Crushed Grape, Funky Fuchsia, Lemon Zest and Calypso Teal
3. I used my "hearts stencil" by Teresa Collins with purple, and teal by Claudine Hellmuth Studio and magenta by Winsor Newton


4. I played a bit more with flowery stencil by Teresa Collins again and some blackboard paint and modeling paste, to add some dark accents on the background and some texture.
5. I stamped a chandelier with some grayish acrylic randomly all over the pages. Then I added some white lines with Gesso and some dripping with the Dylusions.
At this point my background was done!

Time for my "whimsical" girl.
6. I used a 2B pencil and a standard photocopying paper to make the face. For coloring Suzi Blu uses prismacolor pencils, apparently these have beeswax and allow you to make these smooth smoky eyes. I dint have these kind of pencils, and I decided to try her technique using my water pencils instead. I used all the flesh tone colors. I played a lot around the eyes. My doll is not half as pretty but I think it's good enough for a first attempt. Actually I am pretty proud of it because it's not a copy, but my own design, using the principles described in the book with different equipment. I cut the face, glued it on my page using matt medium underneath and over it. Then I added more layers of colour. I tried to make it darker on the right, under the nose, the lips and the eyes. The eyes.... I have miles to go before I achieve this smoky look  
 
Oh, I had so  many back and forths with the eyes... My watercolour pencils was not ht ebest choise for the eye-lines and I had problems with the iris as well. It started in hazel, then made it a dark blue using acrylics and in the end I used the Silks Acrylic Glaze in Emperos Gold (the one I fell in love with and used on the sun on my Enjoy The Little Things page!)
7. Then I drew the rest of the body and the hair. For the hair I used a water colour pencil. For the body I used several things.
 
 
8. The top is a washi tape, kids quality, I bought it from Imaginarium last week when I bought an Easter present for my son (lol).
9. The skirt is a wide pink ribbon. Under the skirt I put some tulle that I painted purple using my acrylics and on top I put some constructors tape bought from the neighborhoods hardware store. Then I added some purple satin ribbon at the bottom and purple paper ribbon around the waste. On purpose I added many different and contradicting textures. At this point I felt like a fashion designer!  LOL
10. She is holding a banner made by purple thread, I painted 4 triangles in silver and wrote "TRUE" in purple Stickles. Again used matt medium to glue it but made sure the curl the corners, just to give it a bit of dimension.
11. I stamped the quote. I decided to use the exact quote provided on the moodboard. Again used matt medium and then I traced around the boarders with my purple Faber Castell Pitt Artist Pens and smudged it with my finger.
12. Finally, I created a frame around the page using silver pen, purple glitter and a black marker.
 
 
I think by now you know that Purple is my favorite color. It's true. I can't hide it. :-)
 
I guess, I am entitled to love the color purple!
 
At this point I thought that it would be cool to have written all the things that I like, all the things that I am  and believe in, but I would prefer these to be in the background, behind all the layers off water sprays, acrylic stencils, modeling paste etc. This would represent all the base, the foundation of the page.... Never mind. I log the thought here so that I won't forget and will do it in the future, once I have mastered my technique of making whimsical girls with smoky, tranquil and wise eyes.
 
Till next time..... remember to be you!


Tuesday 7 April 2015

Enjoy The Little Things

Oh well, where should I start from? I was lucky enough to be the winner of the random draw at the Scraps N Pieces Challenge Blog. I was over the moon when I read my entry was the lucky winner. My birthday was coming up as well (it was actually yesterday) :-)  
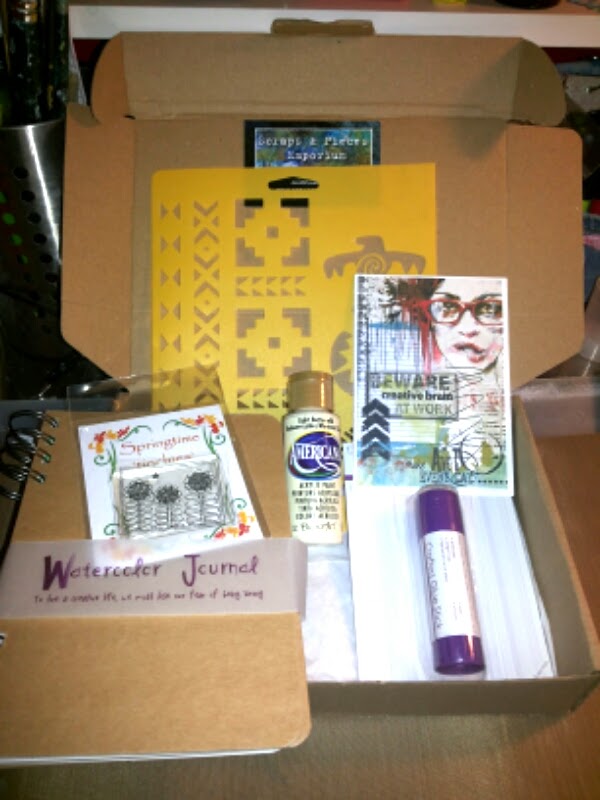
The present I received, as you can see at the picture bellow, is absolutely wonderful!! A stencil, a stamp, a watercolor journal, a glue, an acrylic at a color I didn't have up to now and an amazing card, with nice wishes at the back and I loved so much the artwork at the front (it reads BEWARE creative brain AT WORK). I have already made 2 copies of it, an A5 size and I have placed it at the wall behind me at work and an A4 size  that's going on the door of my creativity room at home.
I can't thank the girls over at Scraps N Pieces Challenge Blog enough, and I will definitely be taking part at the next, and future challenges.
Now, as I mentioned, my birthday was coming up and my man's present was to chose a range of art supplies. I had to do it last weekend in order to have everything available for my birthday. I went online and felt like a kid at a candy-shop! I was working on my list for hours! I made lists on several different shops and in the end I chose the list that I preferred the best LOL.
I don't mean to brag about it, but  I can't hide my excitement either! This is my present and I am presenting it because today I will show you what I made with  some of it:

There were stamps, stencils, mists.... I also threw in there the set of Silks Acrylic Glaze shown bellow (called Goodnight Kiss). I had no idea what this was exactly, apart from the fact that these are good to paint on silk , I guess. Oh well, I won't be doing any painting on silk but I couldn't wait to use this product. These are very shimmery!  


So, the following Art Journal page, was created because I HAD to use these paints. They are so shimmery, that I could only think of the sun.
 
Before I start describing it, let me tell you that this page is miles away from perfection. It's full of imperfections. But in order to learn from my mistakes, I have added at the end the list of the "learning/ what didn't work / what to try next time". It's ok to make mistakes, as long as you learn from them, in order to improve, right?

Step 1: The background:
First, (after gluing 2 pages together from each side to make them sturdier and a layer of gesso), for the background I applied Tim Holtz Distress paint - Salty Ocean with a baby wipe. Then, some random stamping using a harlequin stamp (that was also included in my present) with Tim Holts Distress paint - Chipped Sapphire, and some random stenciling with TCW384 Well Rounded stencil and Tim Holts Distress paint - Picket Fence. Finally I used some Modeling paste with my favorite Purple Acrylic paint and the  "Burlap" stencil shown below and applied randomly all over the pages.


Step 2: The sun
I colored a page of aquarelle paper with Dylusions - Lemon Zest, Tangerine Dream & Cherry Pie), Then, I drew a sun with thick rays and cut it. I glued it on the page using Winsor Newton-Matt Medium .... big mistake! Not a problem with the particular medium, not at all, I have used in most of my creations, but very difficult to glue such a thick paper on acrylic with this type. It took me a lot of effort to make it stay, some of it also got dissolved adding too much medium, I became ugly (Learning #1). Also, because Dylusions are activated with water, when covering the sun with the gel medium (cause I wanted to make it a non-porous surface) it was bleeding out and I had to wipe it constantly (Learning #2). Then it was time to use my Silks Acrylics Glaze, Emperor's Gold on the rays and Love Struck on the sun. I am really happy with the result! It doesn't show much on the picture, but it's really shimmery and pretty.

Step 3: the little monster and putting it all together
Also, in my present, I chose the stamp bellow.

I have to admit, I love all the Stampotique stamps and I find it hard to get them in Greece. At this point I own my first stampotique stamp, this lovely little monster and therefore I HAD to use this as well. I couldn't wait!

I colored it with my Faber Castell Watercolor Pencils (I LOVE working with them and the next Scraps N Pieces challenge is about watercoloring so I know I will be making something) and cut it. Then stamped it on the page and glued the colored image on top of the stamped image, This technique helped me keep the small details such as the legs of the birds and the hair of the monster.
The I wrote my quote on the sun rays. Again, here I am not very happy with the writing of the positioning of the words but at this point I had decided to just enjoy the process. I like the curly letters but I don't know what I was thinking when I made this calligraphy attempt on the word "little".
Anyway, I did some "false stitching"  on the sun and the rays and tried to put some white highlights on my letters (very poor result. My Homework task is to read and practice this white highlights on the letters). Oh and I did some shading around the sun a nd the monster using my FaberCastell Big Brush markers.

So, here's the outcome:


Learning #1: don't try to glue thick aquarelle paper with gel medium.
Learning #2: next time try to seal down Dylusions with a medium in spray form. 
Homework: successfully highlight letters

Until the next time remember to Enjoy The Little Things!!!